MY EV , 85 electric fiero

MY EV , 85 electric fiero
A conversion of a gas engine powered car to 100% plug in electric.

Sunday, October 26, 2008

WOW ..All I can say is WOW


I finished the bottom of my car today and took it for a ride. WOW ... 40 amps to do 55 mph. Previously this was 55-60 amps. So then I got home and called my friend adam for some dinner. Afterwords we jumped on the freeway and jumped up to 65. 70 amps for what was 125 amps previously. I had no clue that aerodynamics were that hard on a EV. Here is a little video of 55 mph. Yes I have tested this going multiple directions on multiple roads.

Thursday, October 23, 2008

It's been a Month now.


Gas free for a month! It has been nice not to shell out huge amounts for gas. But as soon as I stop buying the price goes down ... Just my luck. Oh well. I have started to cover the bottom of the car for weather proofing and for aerodynamics. I also closed off the front intake. this is my little prototype for now and a better one latter. before and after paint so you can tell. Then on the bottom of the car I just got 1/3 done today ... I will work more on it this weekend I hope.

Wednesday, October 15, 2008

About Electrical

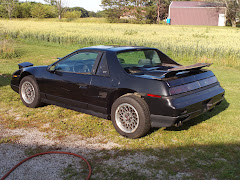
I really haven't mentioned some of the specifics of my conversion. Caution this is for my 85 fiero GT. No guarantee that your car is the same. These are some of the things that I had to do with trial and error because I could not find them on the net.
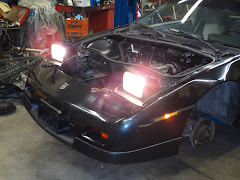
First of all. When removing the engine go to the interior first. remove the center console where your elbow would rest. under here is the ECU that controls most things. Unplug all the connectors from it. Remove it from the car because It wont be needed. all the wires that came out of it should go through the firewall on the drivers side. Take the plastic grommet thing at the firewall and remove it from the firewall and press it into the engine compartment. 45% of the wires are gone now. On the passenger side of the car there is a mini junction next to the battery. Take the bolt out of it and remove the harness going to the engine. That is the other 45 % of wires. The other 10% are up to you... but most of the engine harness is 
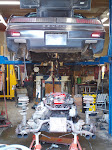
disconnected and it should be easy to remove the engine. I did it the hard way and actually disconnected everything. This took forever.
With this harness removed the only thing that will suffer on your EV conversion is the speedometer and the Tach. I haven't devised a Tach yet so I hope someone gives me there insight on it. But the speedometer is easy. For some reason the ground to the speedometer went through the ECU. Use your wiring diagram to find it and go to frame. Then the 2 wires for the sending unit also were in the harness you removed. I ran these from the gauge to the sending unit. There was a purple wire on both ends of mine so I kept it constant but the other wire changed colors.
Helpful hint with the Speedometer is this. When you go to on or ACC the speedometer should go to Zero. If this does not happen it doesn't have power or it is broken. Any guidance on hooking up the Stock Tach would be great.

Friday, October 3, 2008

To Paktrakr or anyone that can fix this. help please.

My Paktraker is on the fritz. It does not read voltage steady. It isn't a reliable reading when the motor/controller is running. The pavk V/1 is all over the place. The Pack SOC does not seem to work at all. When It has started drooping all of a sudden it will reset to 100%.

Other questions I have are:
Can you set it to Not change to other Things IE: Alerts or SOC?
Can you make the light come on with a current Draw above XX.x A?
I think the SOC might fix itself after i get steady voltage.


Reply from Paktrakr:

Hi Larry,

This looks like a typical problem of electrical "noise" getting in to the PakTrakr data cables. This happens when the data cables (the gray cable between Remotes and between the last Remote and the Display) are run too close to the high-current battery cables, motor, controller, etc. Try relocating the data cables as far as possible from the noise sources. And don't under any circumstances run the data cables through the same bulkhead holes as high-current battery cables.

Ken Hall

Well I am going have to get it in the air to fix a place where I ran them together. The bad thing is I completely read the entire instructions before I installed. This would of been nice info before I started.

Driving my Car

I totally left out the first drive video and I haven't posted one of me driving. So... Here it is. Hope you enjoy and it encourages you to build your EV.